

- Centralized Authentication - One login for all enterprise applications.
- Enhanced Security - Organization-controlled access.
- User Management - Centralized user provisioning and deprovisioning.
- Compliance - Meets enterprise security requirements.
- User Experience - Seamless authentication experience.
Okta SSO Configuration
In this section, you will find the necessary steps to configure Okta SSO for your Odin AI instance.Prerequisites
Before you begin, ensure you have:- Okta administrator access.
- Your Odin AI instance URL.
Step 1: Okta Application Setup
-
Log in to Okta Admin Console
Visit your Okta admin console and navigate to Applications > Applications. -
Create New Application
Click Create App Integration, select SAML 2.0 as the sign-in method, and click Next. -
Configure General Settings
Enter an app name (e.g., “Odin AI”), upload the Odin AI logo if desired, and click Next. -
Configure SAML Settings
In the SAML Settings section, enter the following (for Odin AI Cloud use the URLs below):- Single Sign On URL:
https://api.getodin.ai/user/okta/sso/saml/acs/admin - Recipient URL:
https://api.getodin.ai/user/okta/sso/saml/acs/admin - Destination URL:
https://api.getodin.ai/user/okta/sso/saml/acs/admin - Audience Restriction:
https://api.getodin.ai/user/okta/sso/saml/acs/admin - Default Relay State:
default
EmailAddress, Application username toEmail, and Update application username on toCreate and update.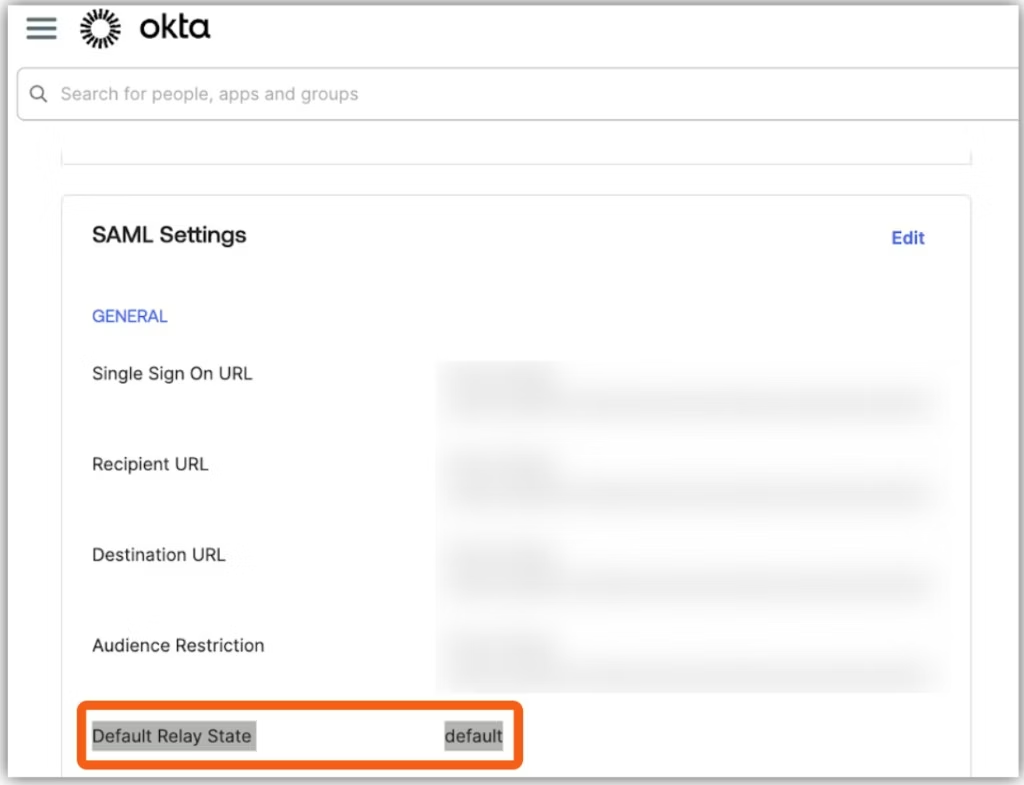
- Single Sign On URL:
-
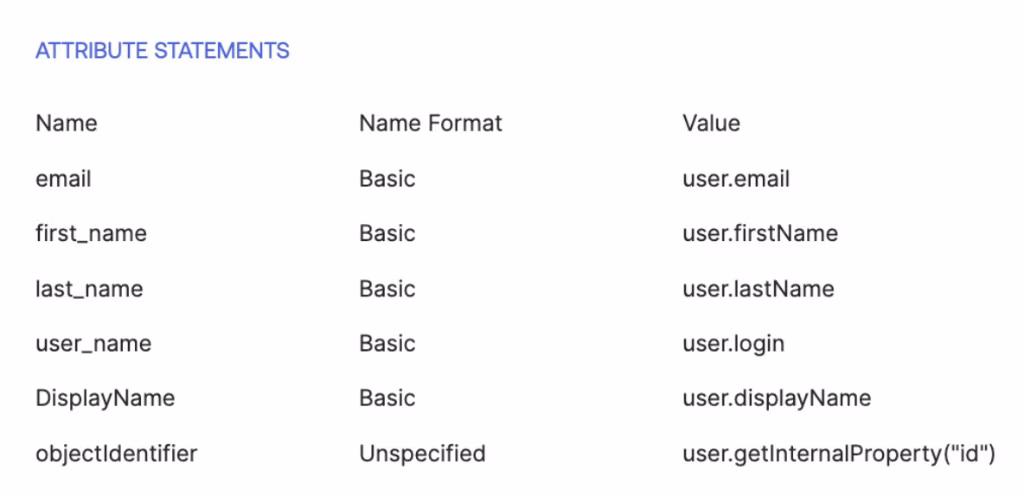
Attribute Statements (Optional)
Add attribute mappings as needed (e.g.email→user.email,firstName→user.firstName,lastName→user.lastName). How to add attribute statements- In Okta, go to Applications > Your App.
- Click the General tab > SAML Settings > Edit.
- Open the Configure SAML section.
- Scroll to Attribute Statements (where you add email, firstName, lastName).
- Click Add Another to add more attributes.
userTags) in the SAML assertion: 1. Create the attribute in Okta- Go to Directory → Profile Editor → User (default).
- Click Add Attribute.
- Set Variable name (e.g.
userTags) — use camelCase, no spaces. - Set Data type: string (single value) or string array (multiple values).
- Click Save.
- Go to Directory → People → select a user.
- Click Edit on their profile.
- Fill in the custom attribute field with a value.
- Click Save.
- Repeat for every user who will use SSO.
- Go to Applications → [Your SAML App] → SAML Settings → Edit.
- In Attribute Statements, click Add Another and add:
- Name:
userTags(or your attribute name). - Value:
user.userTags(must match the variable name from step 1).
- Name:
- Click Save.
-
Group Attribute Statements (Optional)
Configure group mappings if needed. -
Feedback (Optional)
Select feedback options and click Finish.
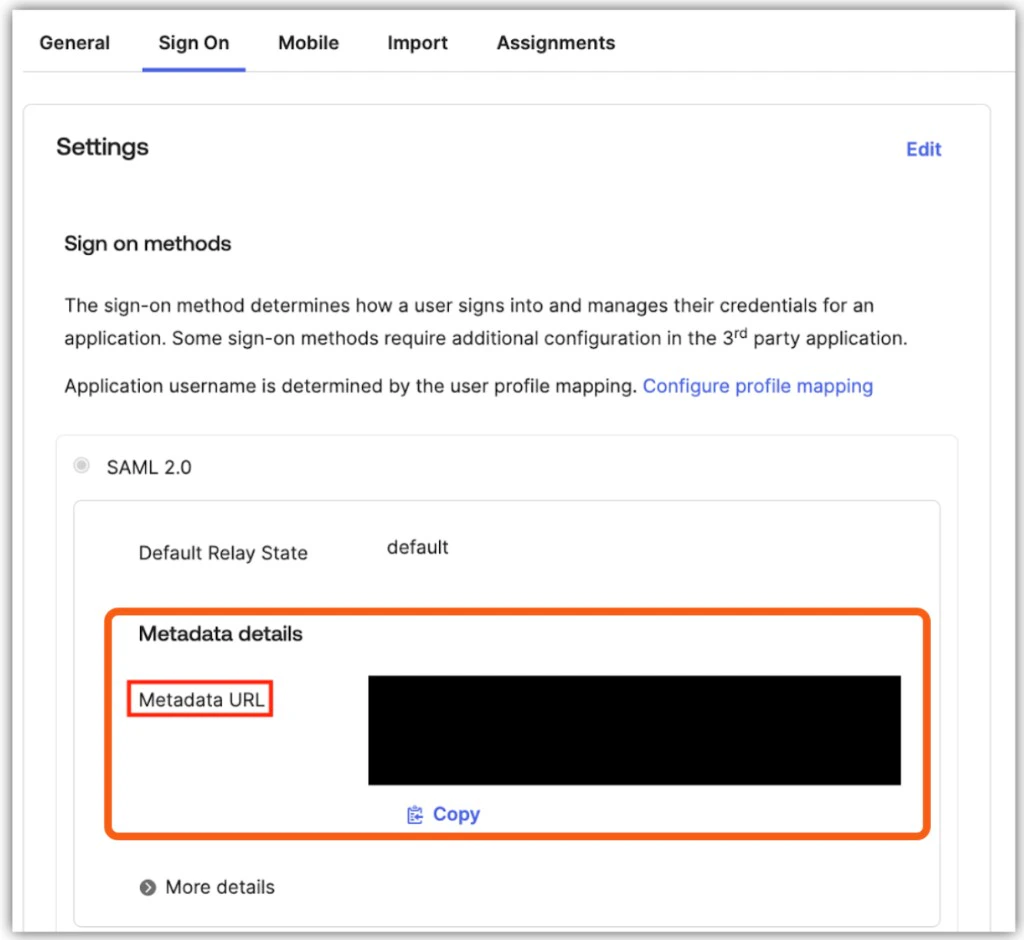
Step 2: Get Okta Configuration
Get the Metadata URLLog in to Okta as an admin, go to Applications → [Your App] → Sign On tab. Then go to Settings → SAML 2.0 → Metadata details → Metadata URL. Copy the URL (use the Copy button).
Step 3: Submit Configuration to Odin AI
Odin AI’s support team will configure and test your SSO setup. Please provide the following information:-
Send Configuration Details
Email Support with the following information:- Provider: Okta
- Enterprise ID: Your organization’s domain (e.g.,
company.com) - Metadata URL: The Okta metadata URL from Step 2
- SSO Sign-In Only (Optional): Specify if you want to require SSO for all users with this domain.
-
Odin AI Configuration
Odin AI’s support team will configure SSO on your instance and test the connection. You will be notified once configuration is complete. -
Testing
Odin AI’s team will test the SSO connection, and you may be asked to verify that it works. Once confirmed, SSO will be enabled for your organization.
Troubleshooting Okta SSO
In this section, you will find common issues and solutions related to Okta SSO. Issue: Redirect loop or authentication failureSolutions:
- Verify the Single Sign On URL, Recipient URL, Destination URL, and Audience Restriction all match
https://api.getodin.ai/user/okta/sso/saml/acs/admin. - Ensure Default Relay State is set to
default. - Ensure Name ID format is set to EmailAddress.
- Verify metadata URL is accessible.
- Check that the Okta application is active.
Solutions:
- Verify email attribute mapping in Okta.
- Check that the user exists in Odin AI.
- Ensure user provisioning is configured.
- Verify enterprise ID matches the email domain.