

Prerequisites
- You have:
- your Project’s
project idat hand - a set of API Key + Secret to setup the Odin AI app in Slack
- your Project’s
Install and Set Up Odin AI App in Slack
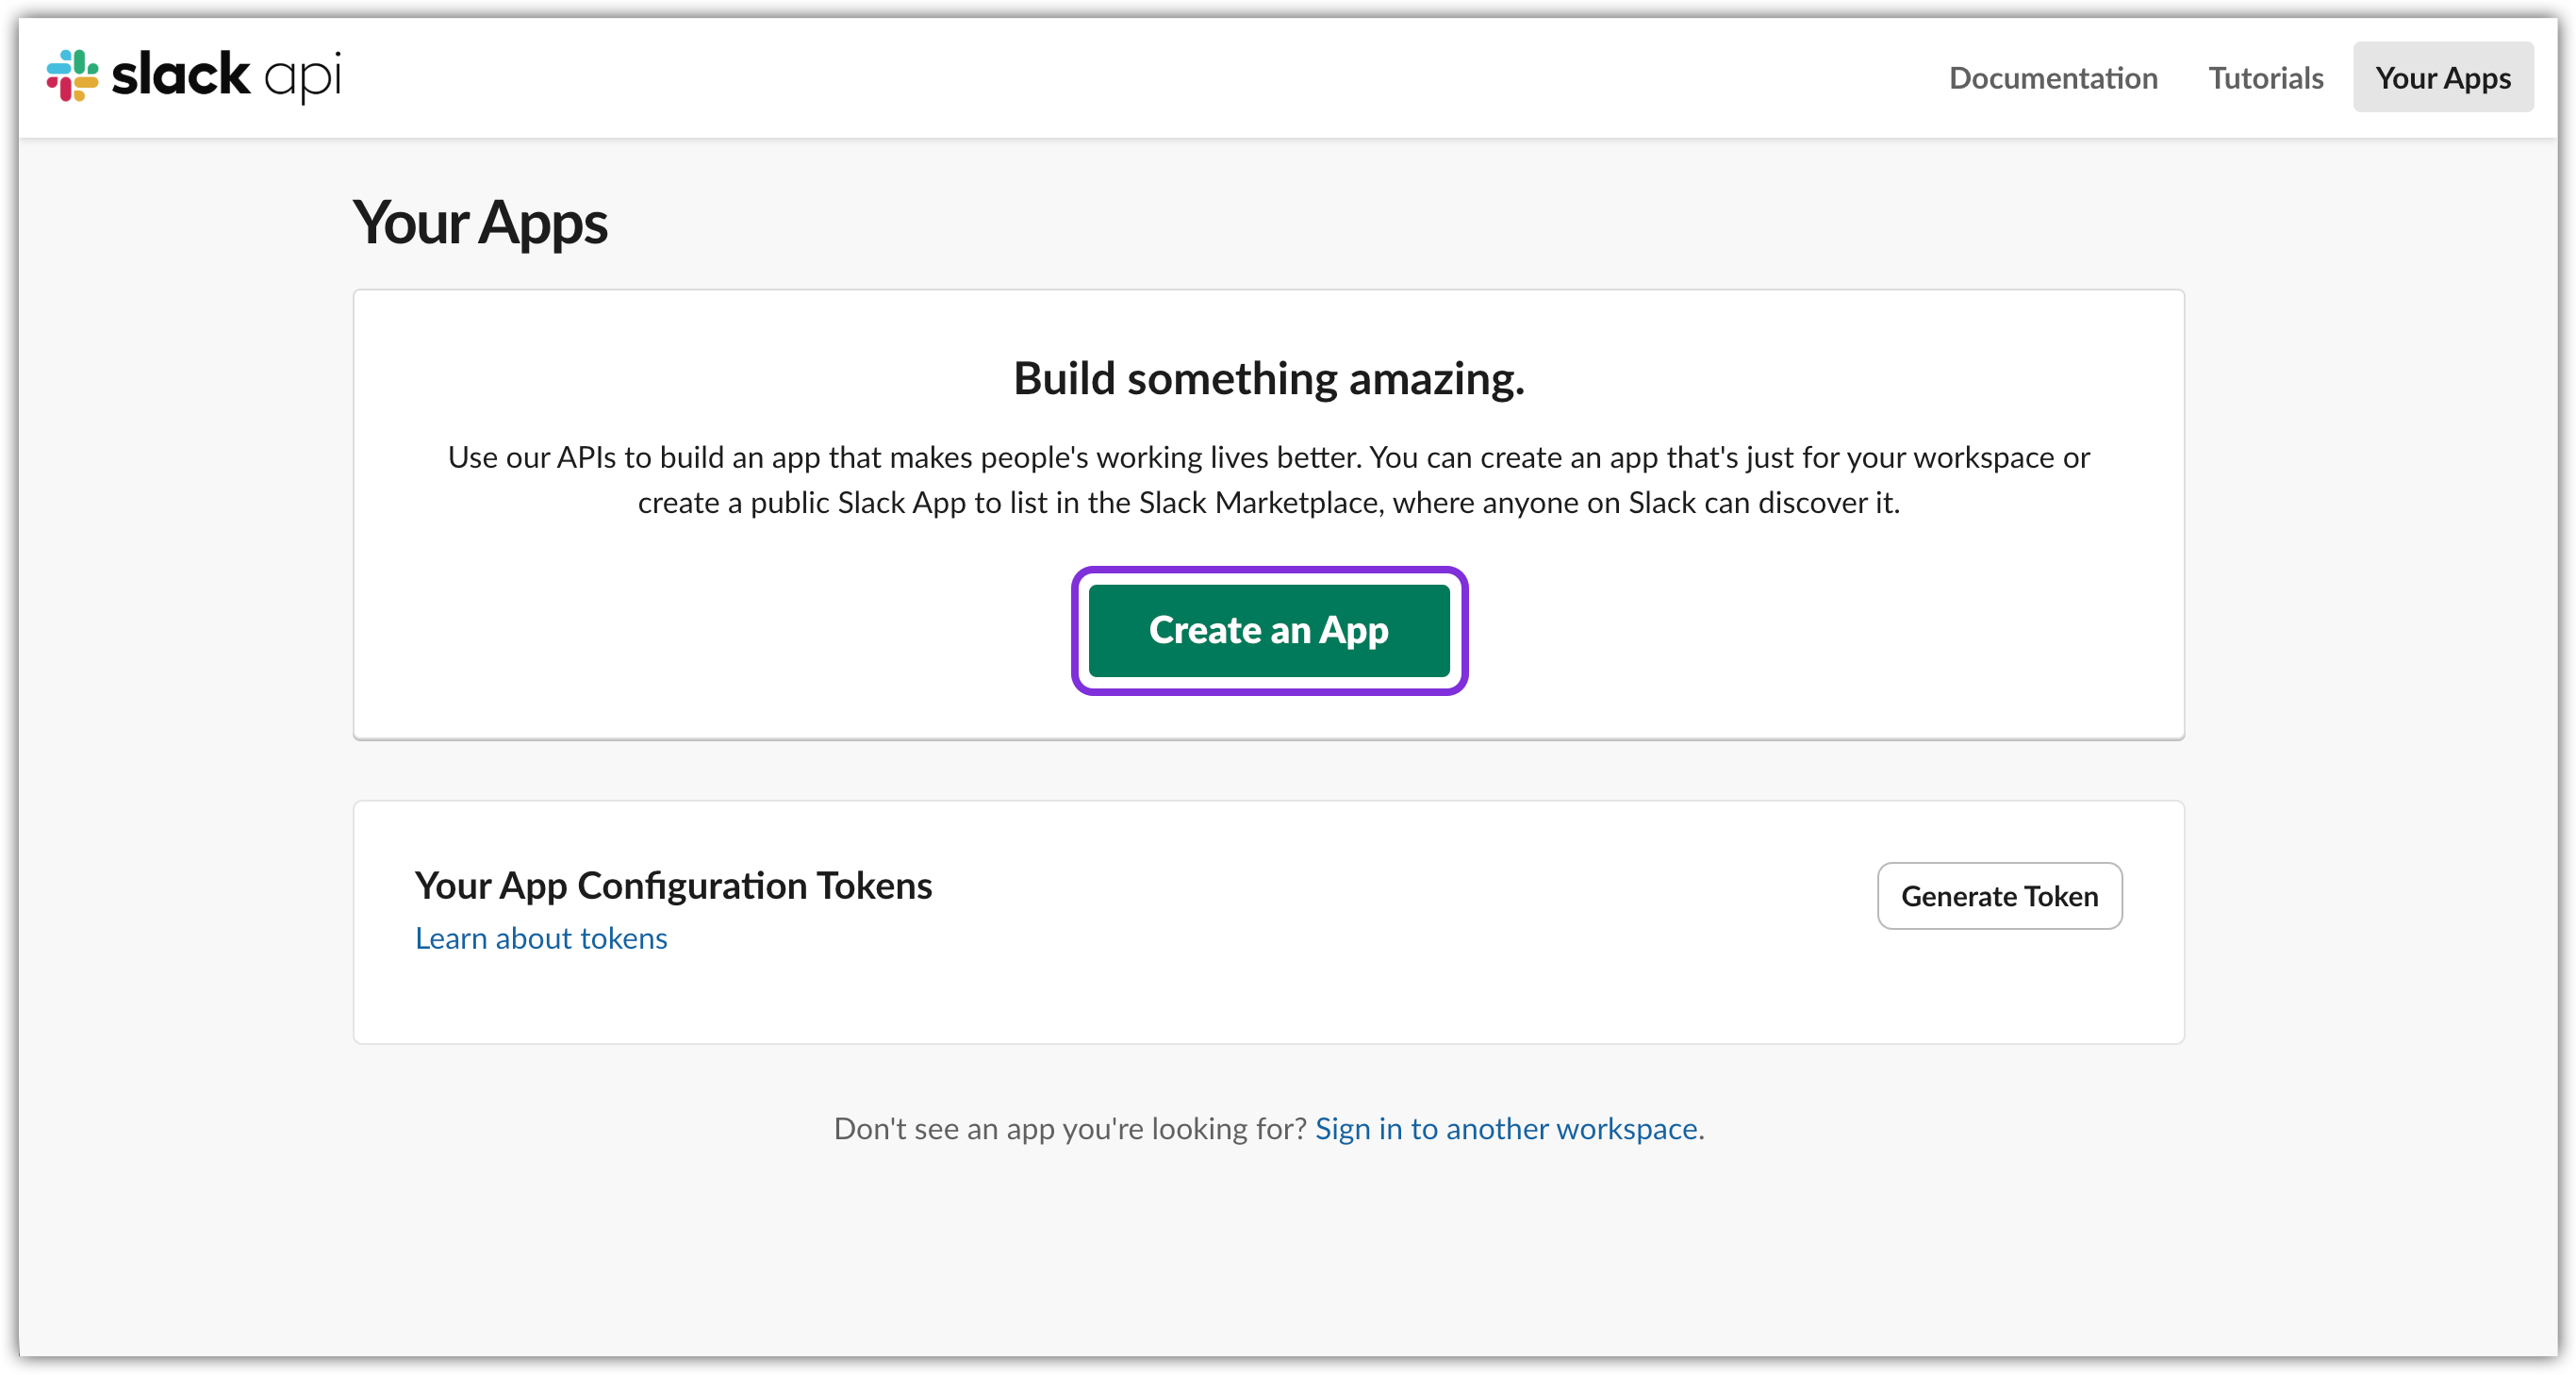
- Go to Slack API Apps. You may need to log in to your Slack workspace.
- Click Create an App.
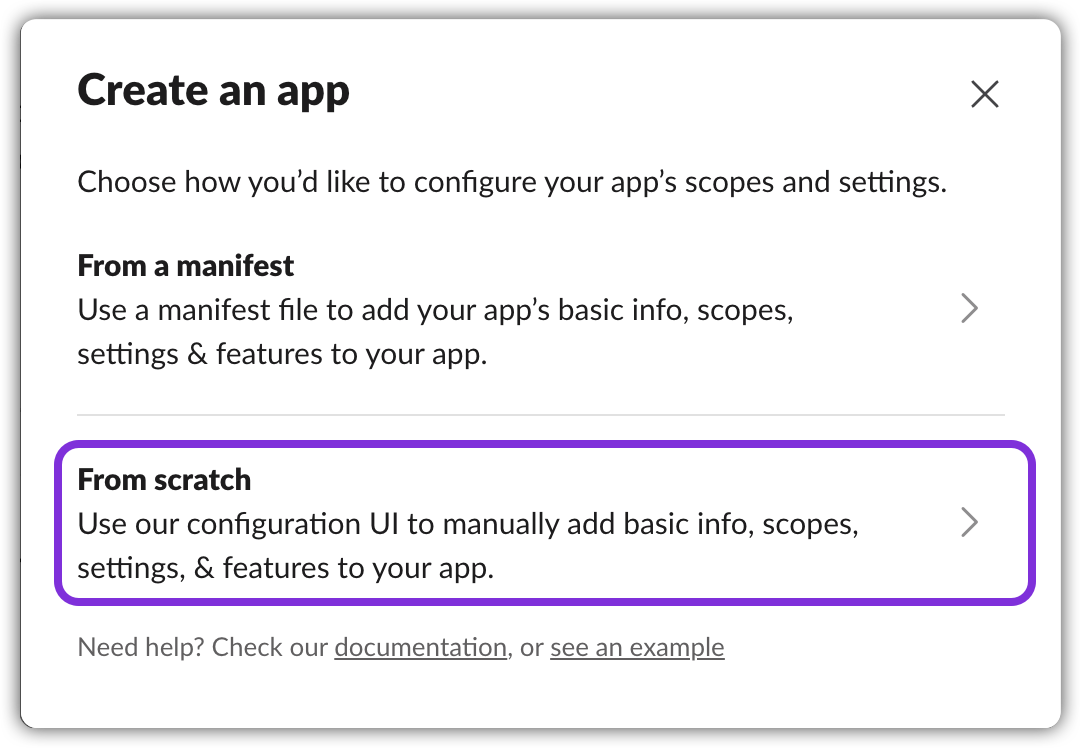
- Select From scratch.
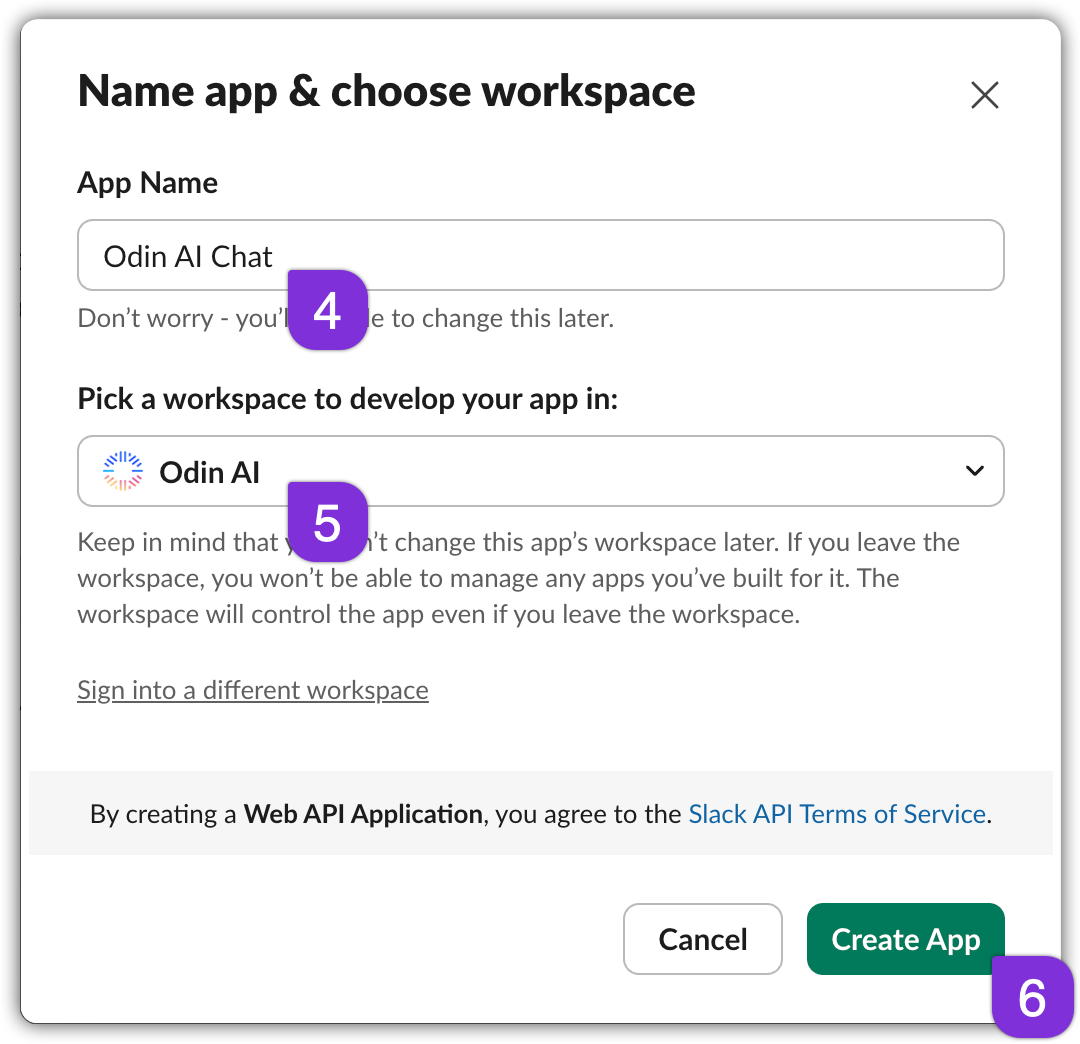
- Enter the App Name (e.g., “Odin AI Chatbot”).
- Select the Development Slack Workspace where you want to install the app.
- Click Create App.
- In the Basic Information section, note down the following values:
App ID,Client ID,Client Secret,Signing Secret, andVerfication Token. You will need these to configure the app in step 11 below. - In the left sidebar, click on OAuth & Permissions:
a. Click Add Redirect URL and enter the following URL:b. Click Add and then Save URLs. c. Under Scopes, add the following Bot Token Scopes:
app_mentions:read– to allow the bot to read messages where it is mentioned in conversations the app is in.channels:history– to allow the bot to view messages and other content in public channels that the app is a member of.channels:manage– to allow the bot to manage channels, including creating, archiving, and renaming channels.channels:read– to allow the bot to view basic information about public channels in a workspace.chat:write– to allow the bot to send messages as the app.commands– to allow the bot to add slash commands that users can invoke.groups:read– to allow the bot to view basic information about private channels that the app is a member of.im:history– to allow the bot to view messages and other content in direct messages that the app is a member of.im:write– to allow the bot to send direct messages as the app.users.profile:read– to allow the bot to view user profiles.users:read– to allow the bot to view people in a workspace.users:read.email– to allow the bot to view users emails.
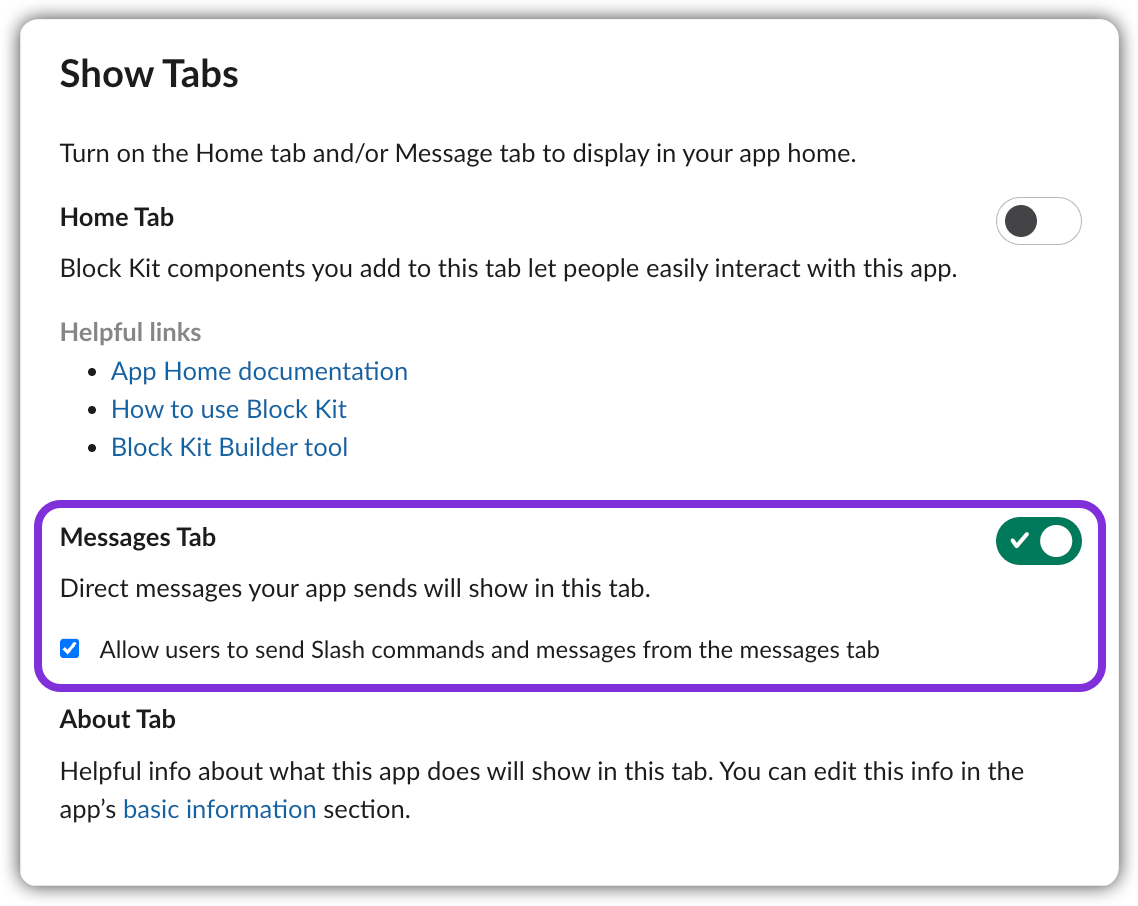
- Click App Home in the left sidebar. Under Show Tabs, ensure Messages Tab is enabled, as well as the checkbox below it.
- In the left side bar, click Slash Commands:
a. Click Create New Command. b. In the Command field, enter/setup.
c. In the Request URL field, enter:d. In the Short Description field, enter something like “Channel Setup”.
e. Optionally, you can add a longer description in the Usage Hint field.
f. Click Save.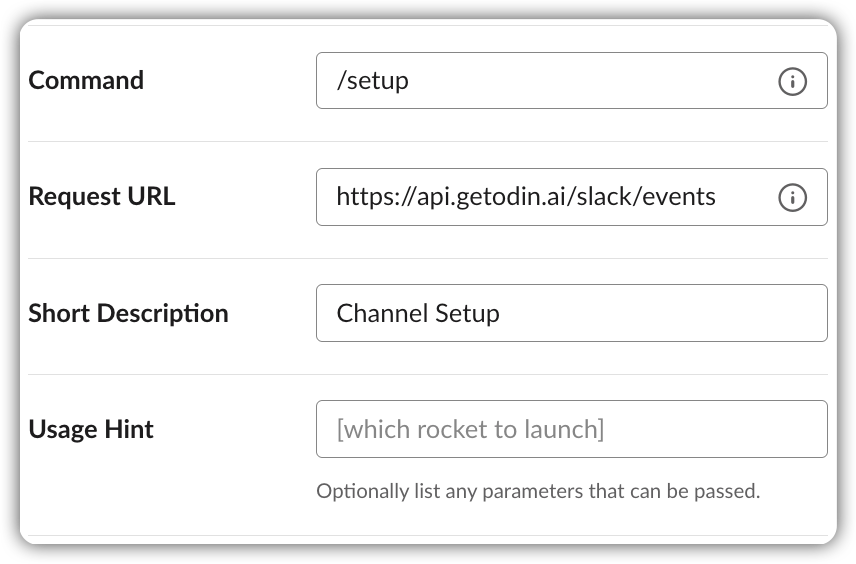
- Complete the following API endpoint URL, with the values gathered in step 7:
Replace
{client_id},{client_secret},{signing_secret}, and{verification_token}with the values from your Slack app found in the Basic Information section. - Open the completed URL in a new browser. This will redirect you to a page with an Add to Slack button. Click this button to install the app to your workspace.

- You will be redirected to a page crequesting permission to access your workspace. Click Allow to grant the necessary permissions.

- You should see a confirmation message indicating that the installation was successful and you’ll be redirected to your Slack workspace.
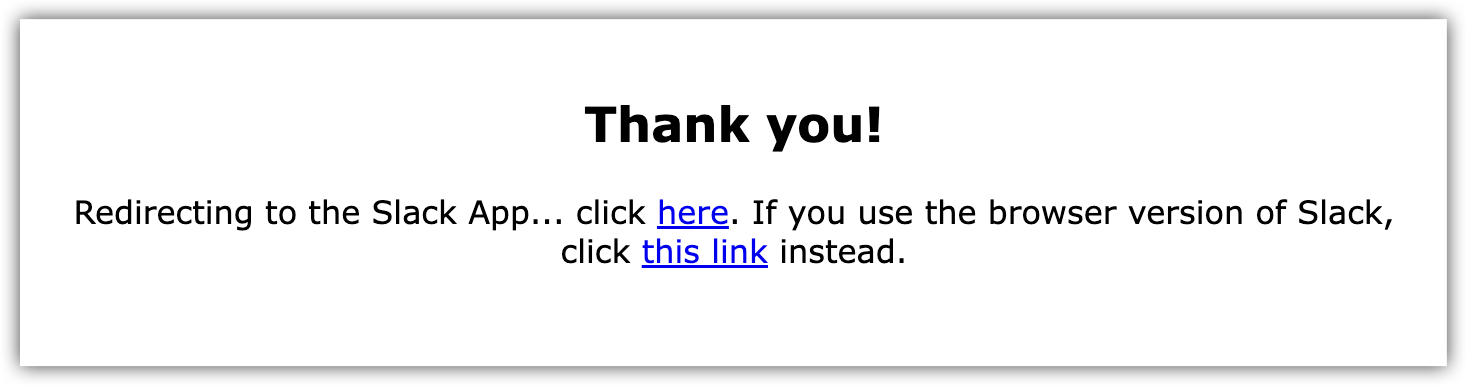
- Go to your Slack workspace, and you should see the Odin AI app in the list of apps on the left sidebar.
 App is successfully installed in your Slack workspace! The next step is to run the setup command to configure a channel for Odin AI.
Set Up a Channel for Odin AI App
To set up a channel for Odin AI, you need to run the/setup command in the desired channel. This command will configure the channel to work with Odin AI.
- Open your Slack workspace and navigate to the channel where you want to set up Odin AI.
- In the message input box, type
/setupand press Enter.
- A pop-up will appear, prompting you to enter the following information:
- Channel – Select the channel you want to set up for Odin AI.If you want to use the app in direct messages, select your own user name.
- Project ID: Enter your Odin AI Project ID.
- API Key: Enter your Odin AI API Key.
- API Secret: Enter your Odin AI API Secret.

- Channel – Select the channel you want to set up for Odin AI.
- Click Submit to complete the setup process. The app will validate the information and configure the channel.
- If the setup is successful, you will see a confirmation message in the channel indicating that Odin AI has been set up successfully.
Odin AI is now set up in your selected channel! You can start interacting with the bot by mentioning it in messages or using the slash commands.