
Designed with usability in mind, Odin AI Tools offer an intuitive interface for interacting with the Workflows you build in the Automator. Each Tool follows a structured sequence of steps, guided by the inputs you define. This framework guarantees flexibility and reliability—allowing you to focus on achieving results rather than managing repetitive tasks.
Create a Tool
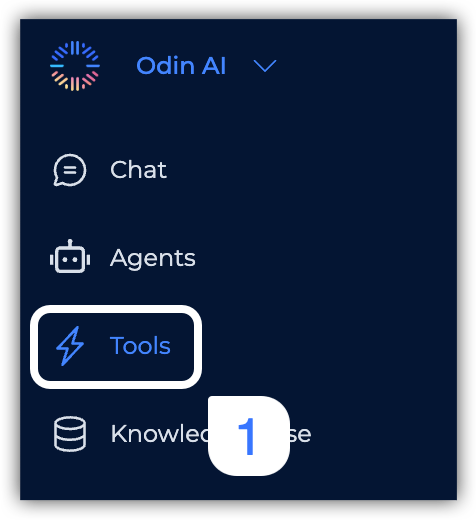
- In your Odin AI project, navigate to Tools.
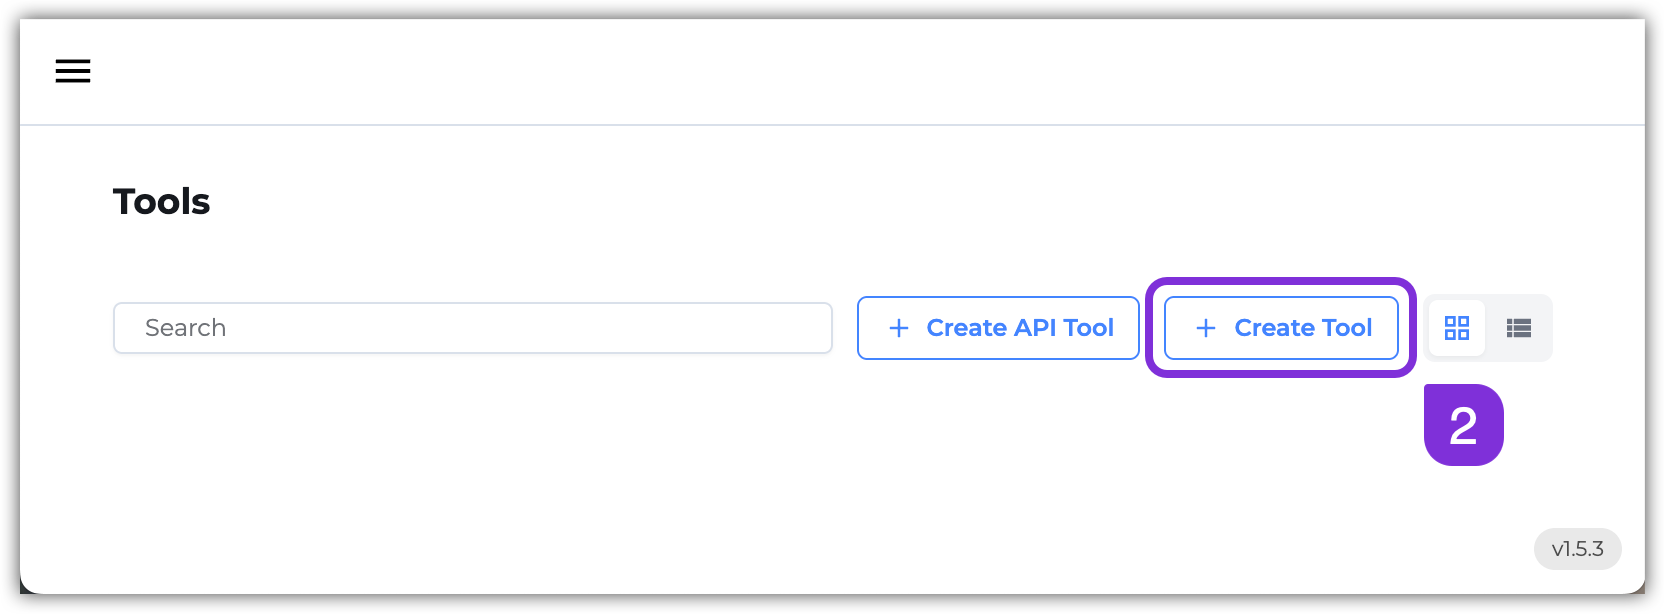
- Click Create Tool at the top-right. You’ll be redirected to the Automator to create a new Workflow, with an Odin Action Trigger block as the first step. In this example, we’re going to create a Tool that creates a new task in Asana.
- Click the Odin Action Trigger block to edit the trigger details. The Trigger is the condition or event that initiates your workflow; when these conditions are met or the required information is provided, the workflow will automatically start.
a. Action Name: Enter the name of your action (e.g., “Create Asana Task”). b. Action Description: Enter a short description of what the action does (e.g., “Creates a new task in Asana.”).
c. Fields: Add the Items (i.e., data or information) your Action requires to run (there’s no limit to the number of fields you can add). For example, if we’re building a Tool that creates tasks in Asana, the required fields could be: “Task Name”, “Task Description”, and “Due Date.” For each field that you add, enter the following information: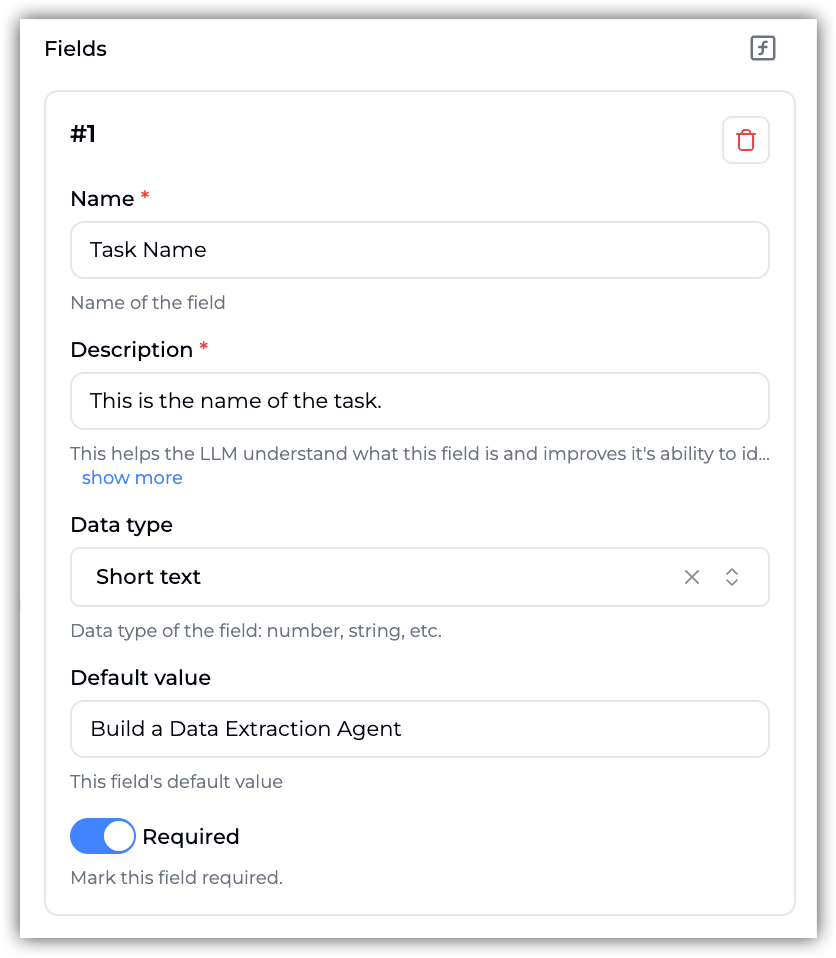
- Name: Enter the Name of the field (e.g., “Task Name”).
- Description: Enter the Description of the field. This helps the LLM understand what this field is and improves its ability to identify and extract information that best fits this field (e.g., “This is the name of the task.”).
- Data Type: Select the Data Type of the field (e.g., for the email use case, the data type of the “Task Name” field is
Short text). - Default Value: Set the field’s default value or leave blank. For testing purposes, always enter a sample value in this field (e.g., “Build a Data Extraction Agent.”).
- Required: Choose if the field is required for the Tool to run. By default, fields are always set as ‘Required’.
- Confirm Button Title (Optional): Edit the title of the confirm button or leave the default value.
- Cancel Button Title (Optional): Edit the title of the cancel button or leave the default value.
- Auto Confirm (Optional): Enable if the Action should skip user confirmation when executing the Action. (This option is disabled by default.)
- Name: Enter the Name of the field (e.g., “Task Name”).
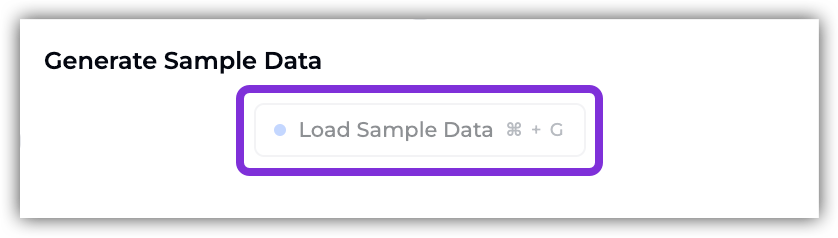
- Once you’re done configuring the Odin Action Trigger, click Load Sample Data under the Generate Sample Data section below. This tests the Trigger using mock data you entered in the Default Value of each field to confirm it’s working correctly.
- Click the + to add the next pieces of your workflow. For this example, we’ve added an Asana “Create Task” step, in which we connected Odin AI to our Asana account and mapped all the fields we previously configured.
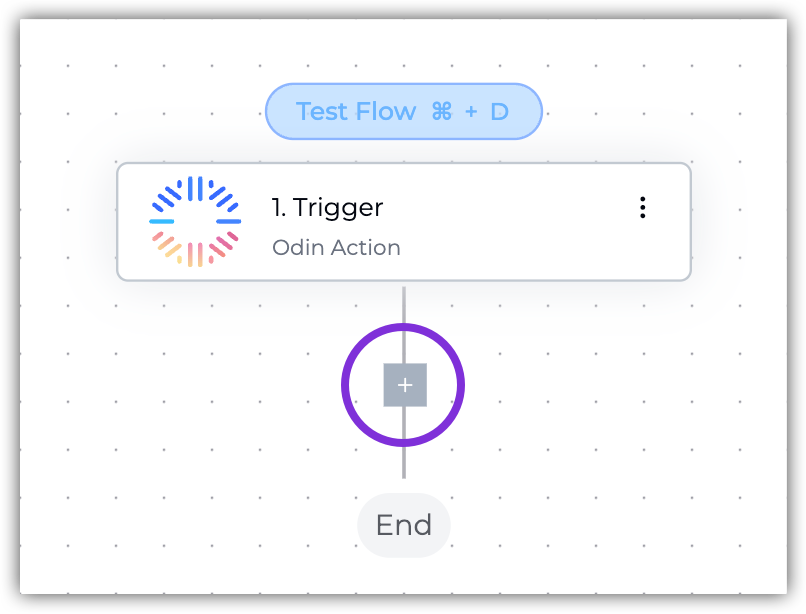
- Once your workflow is complete and successfully tested, click Publish at the top-right corner to publish your workflow.
 Your new Tool is now ready to use!
Use Tools
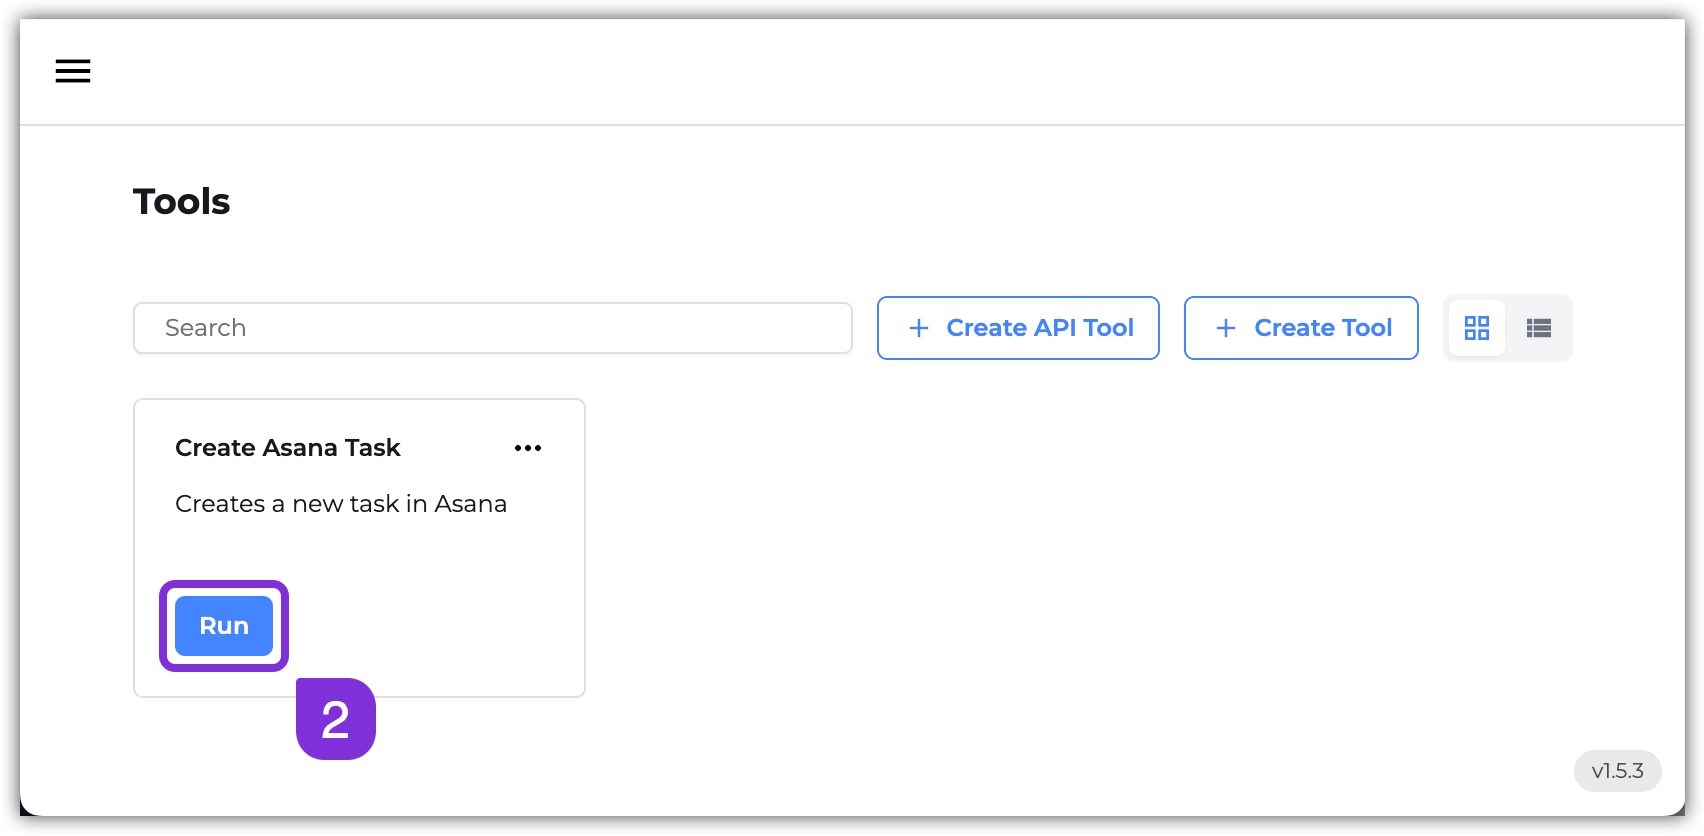
- To access and use Tools you’ve created, navigate to Tools.
- Find the Tool you want to use and click Run.
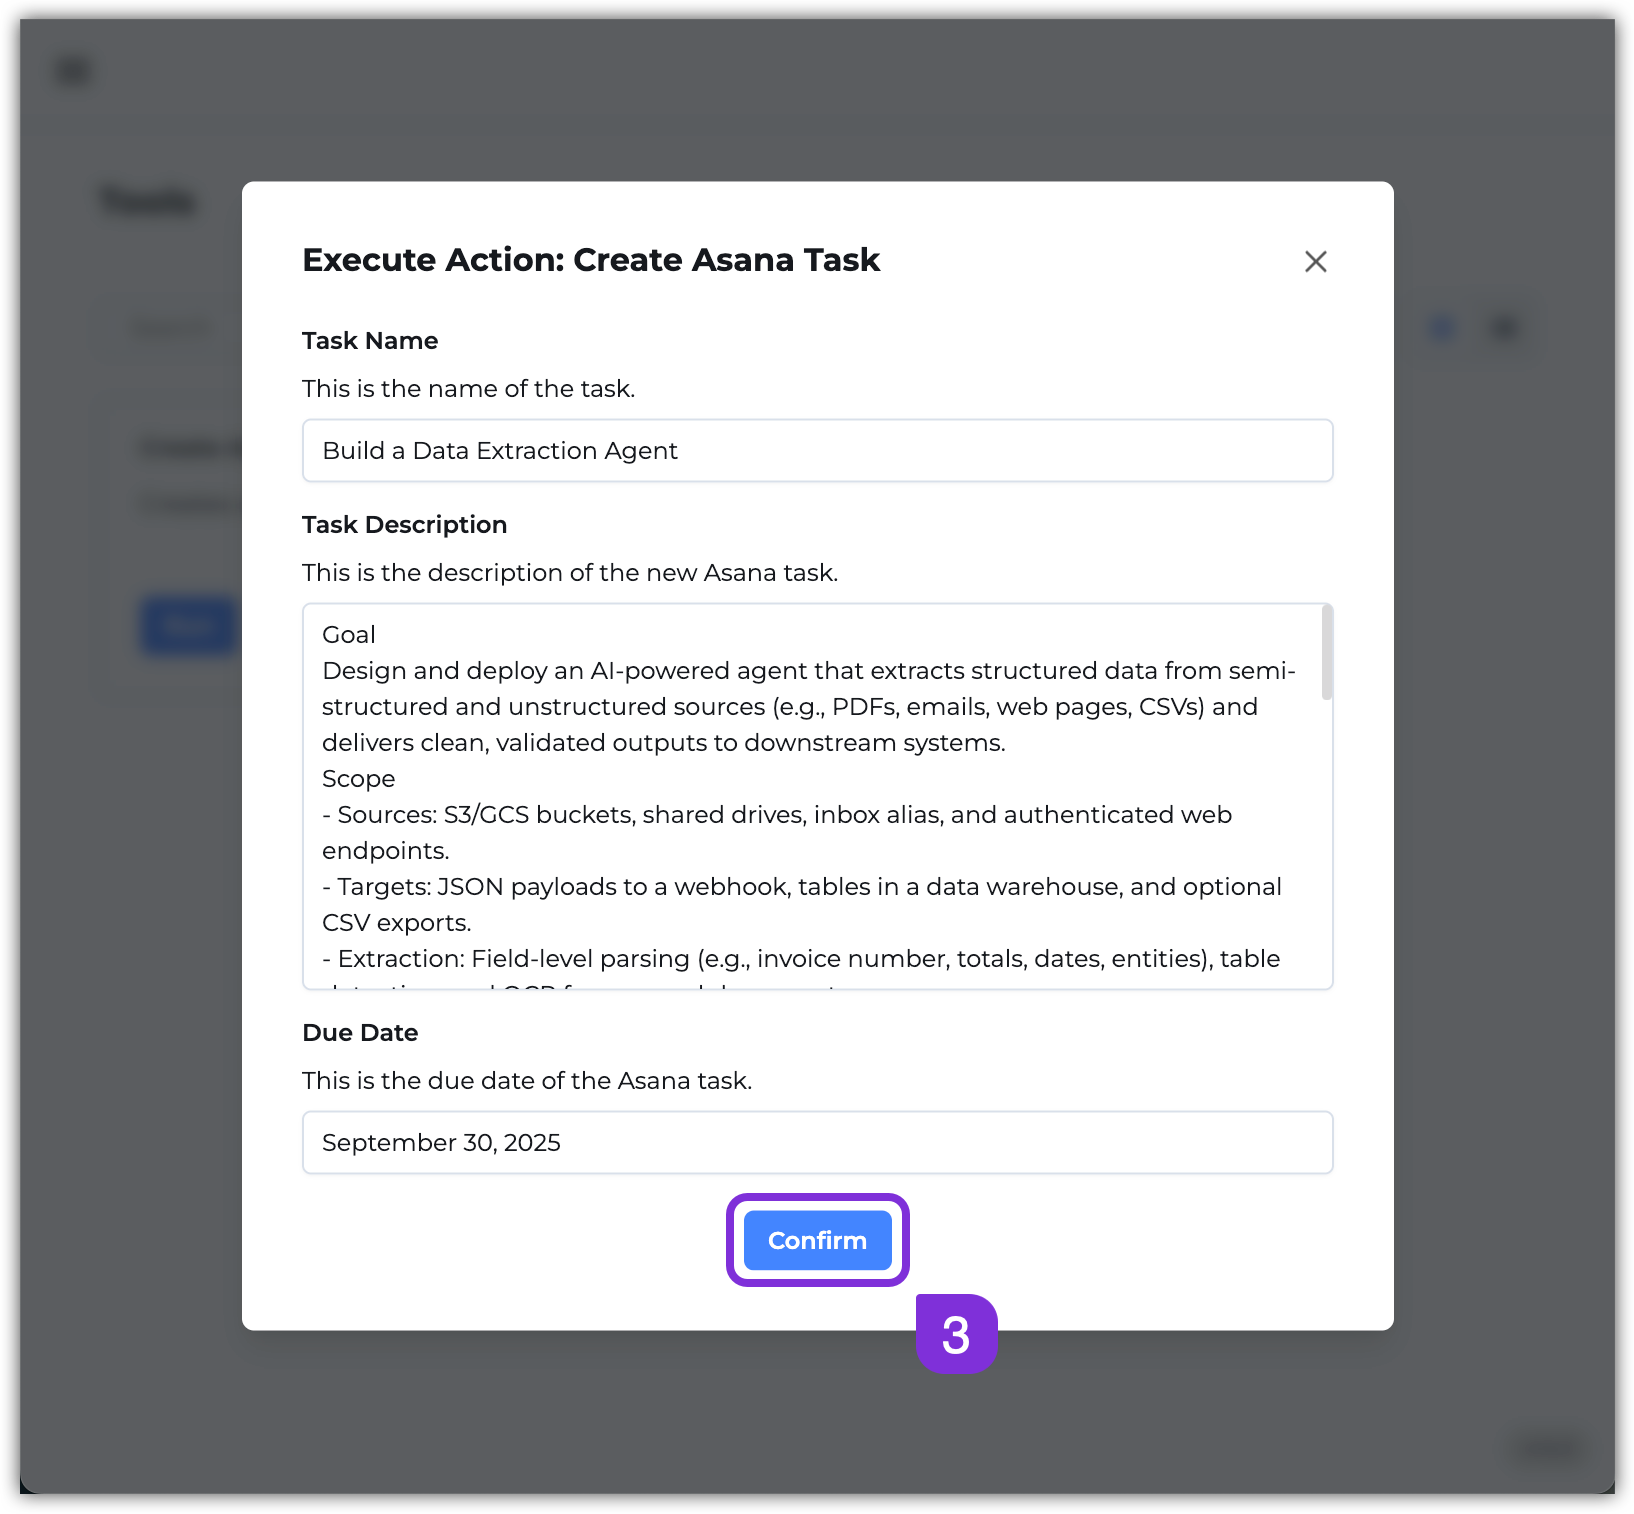
- Enter the information in the required fields and click Confirm. Depending on the configuration of your Action Trigger, an additional confirmation may be required to run the tool.
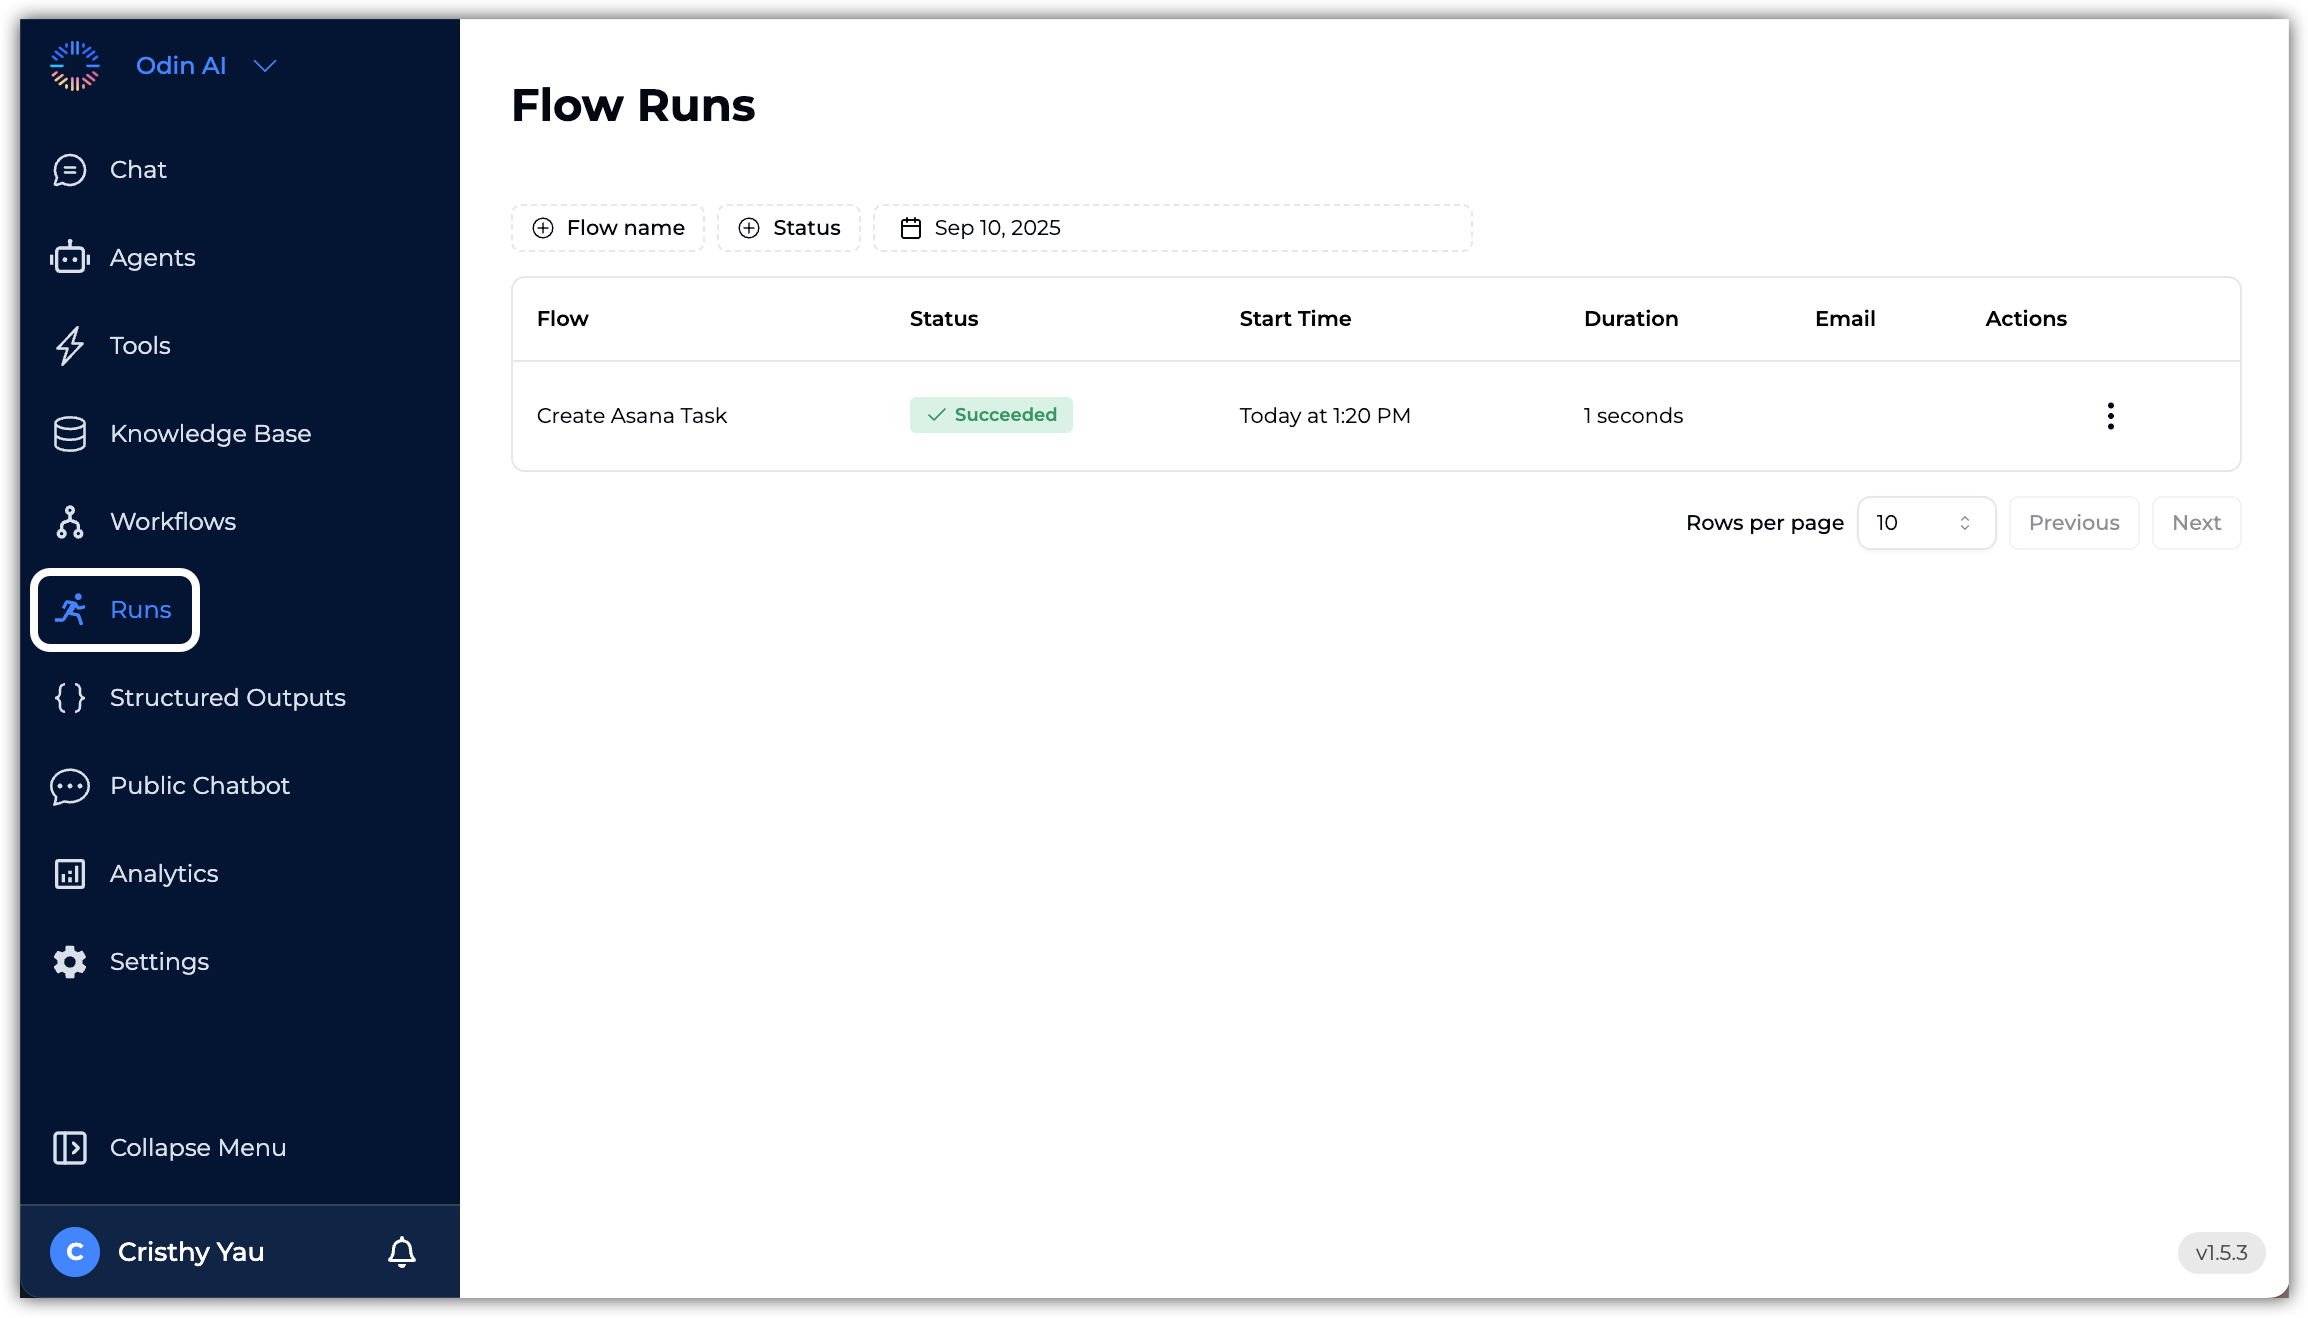
- The Tool begins executing the programmed action. You can see the status of the execution in the Runs section.
Use Tools in Chat
You can also use Tools directly from the platform Chat by adding the Tool to your custom agent.- Navigate to Agents and select an existing agent or create a new Custom Agent.
- Within the Agent’s configuration, add your Tool(s):
a. On the left-hand side, navigate to Tools. b. Click on either +Add Action buttons.
c. Select the Tool you want to add to your agent. d. Click Save Agent at the top-right corner.
 - Navigate to Chat on the right-hand side and test the Tool by providing all the required information in the chat.
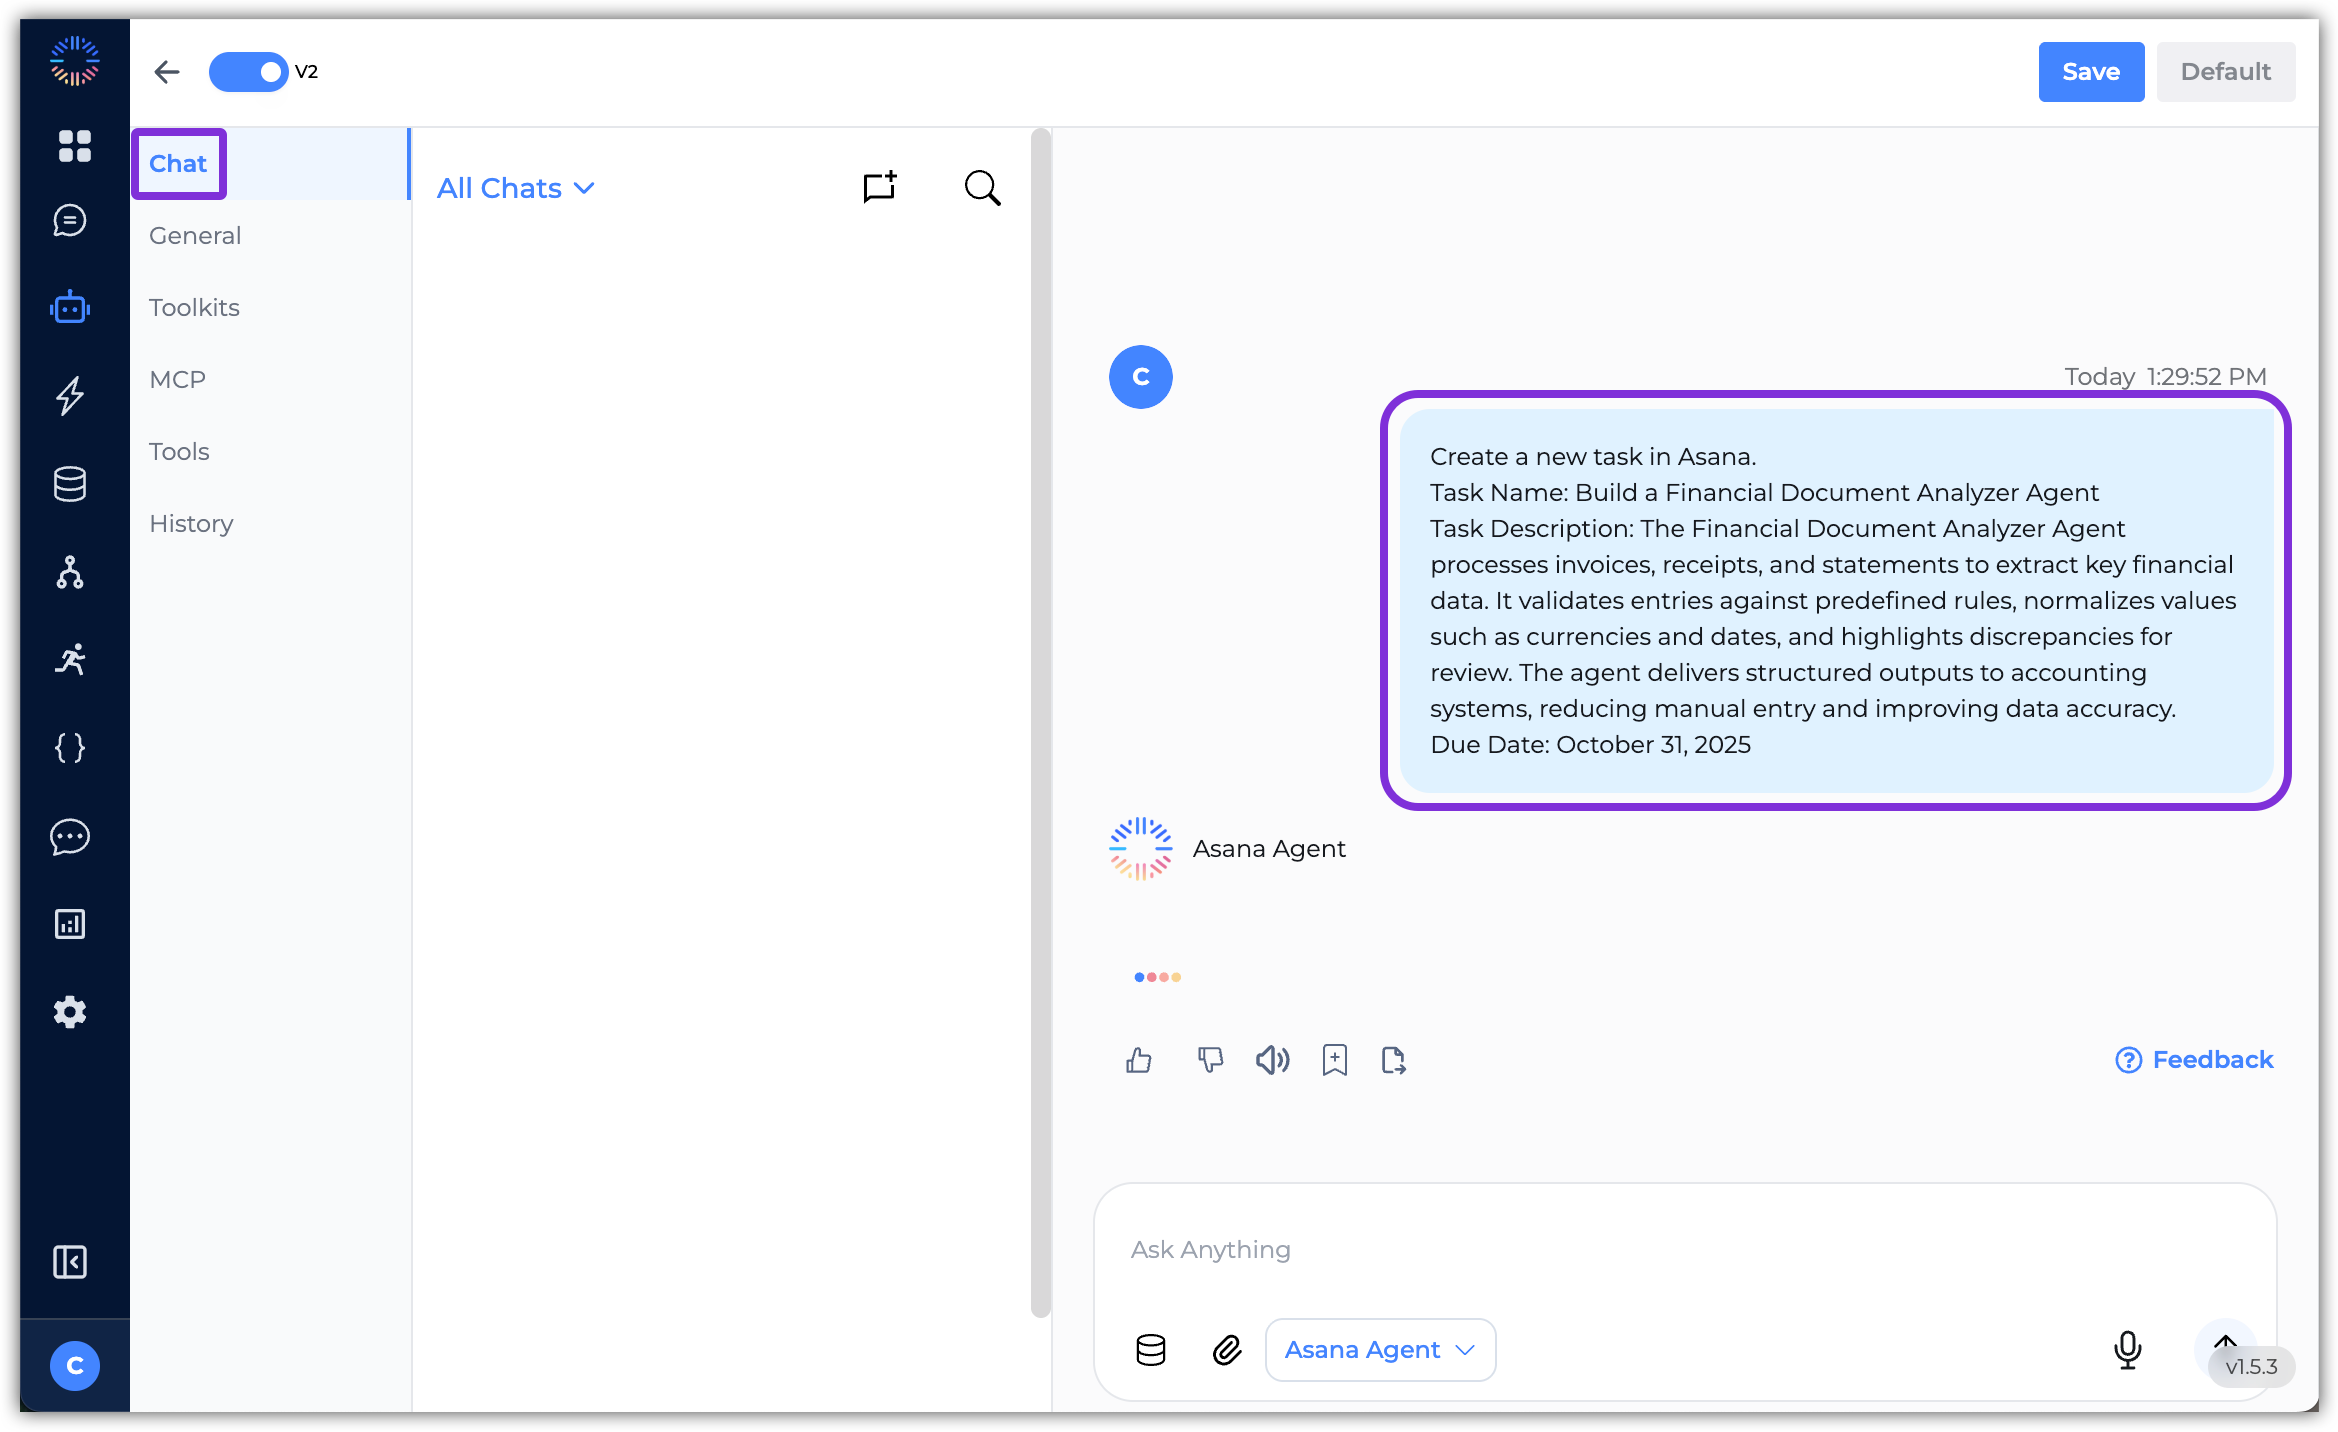
- Once the required information is provided, the agent will run the Tool and execute the Workflow. You can check the status of the Tool execution in the Runs section.
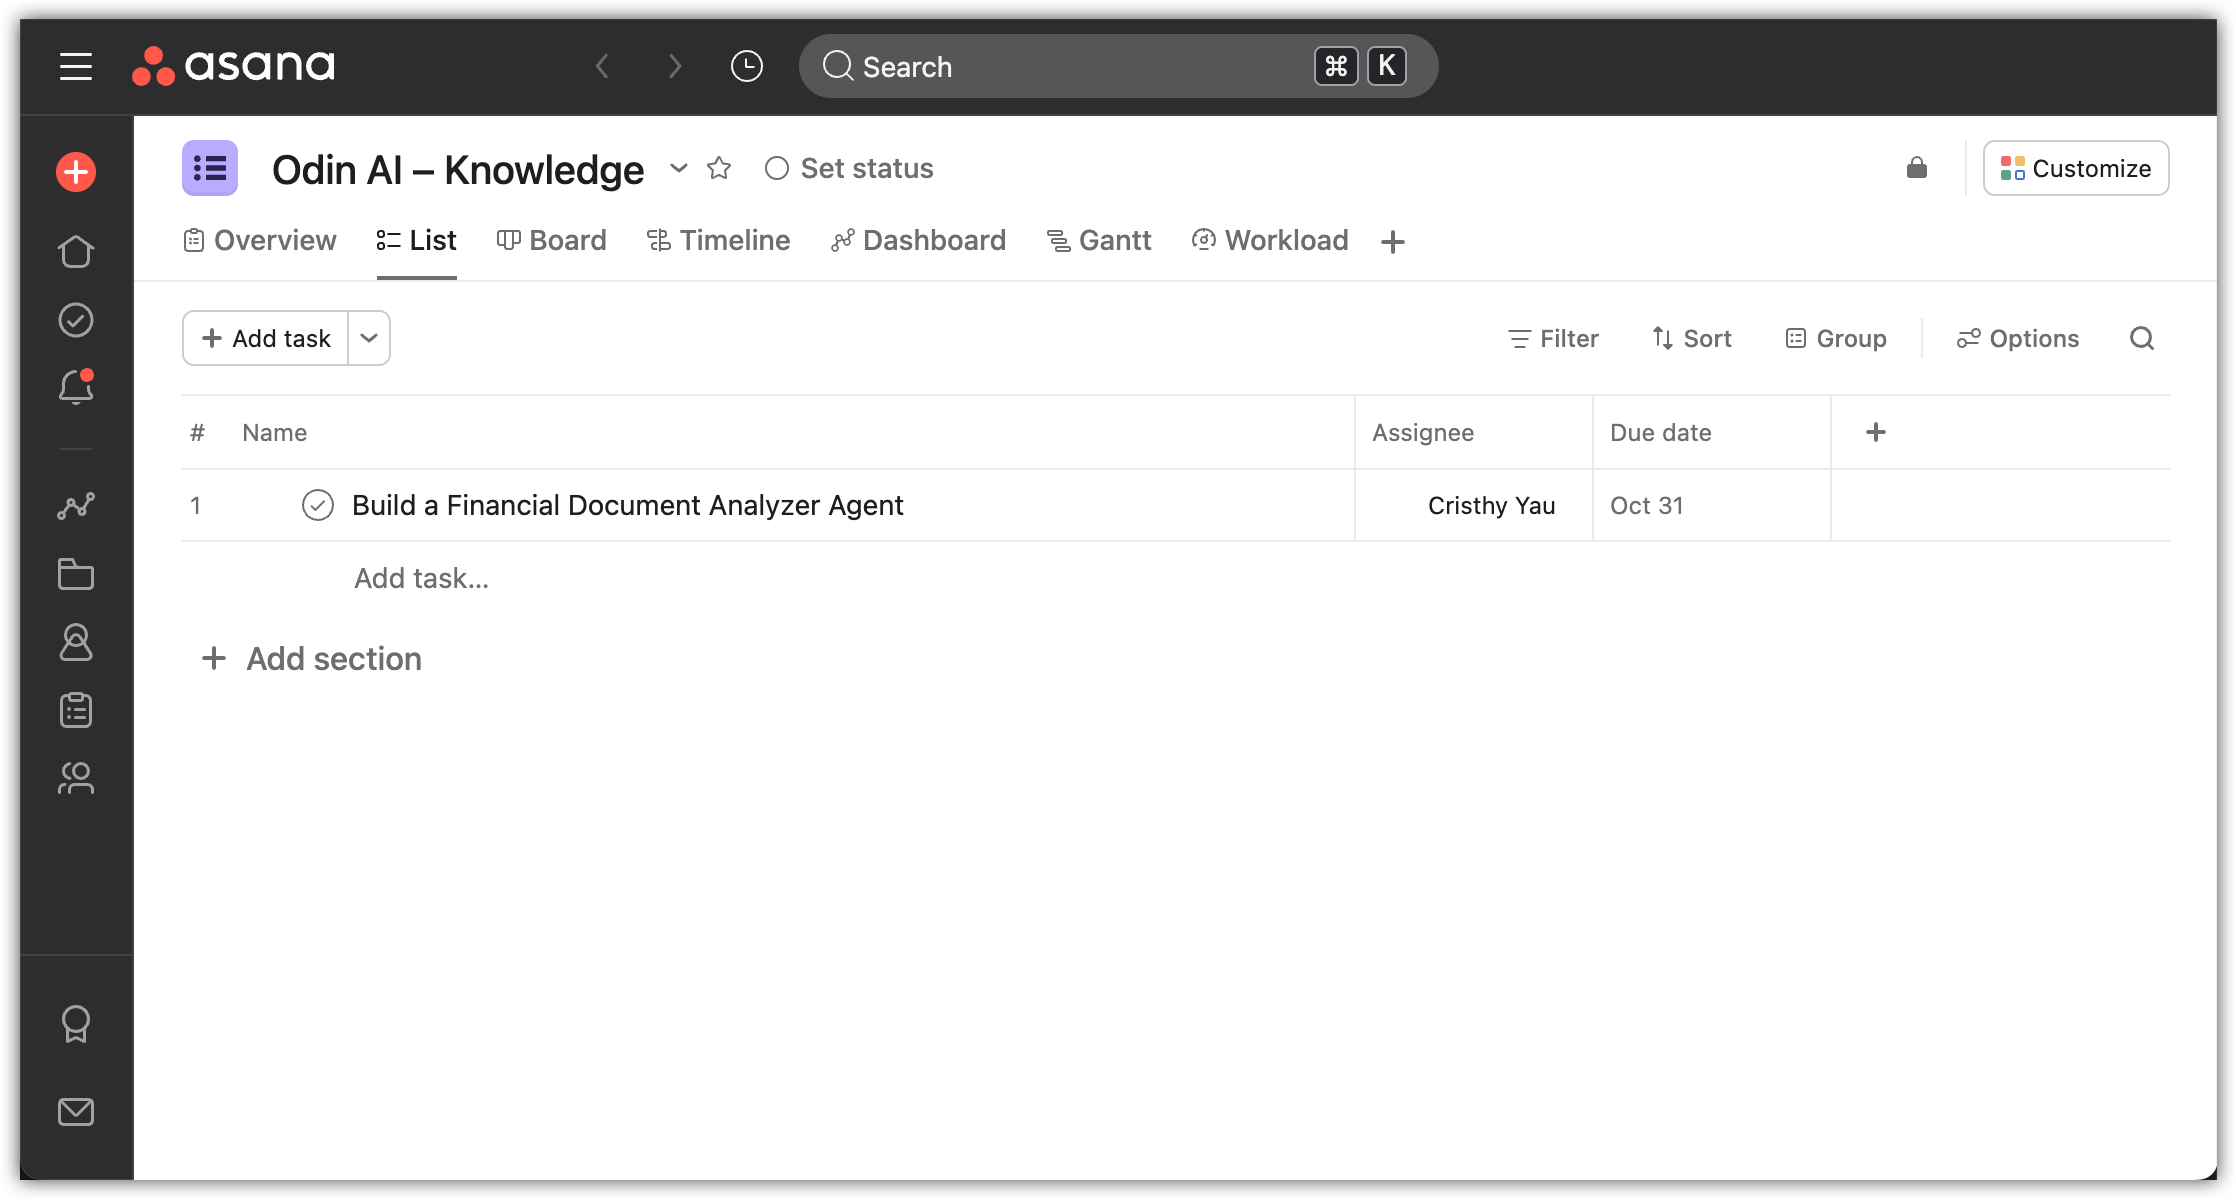
In our example, it created the new tasks in Asana.